You can mask (hide) the sensitive content in incidents from unauthorized users. Masking helps you to meet your regulatory compliance requirements for restricting access to personally identifiable information.
You can use incident masking in the following places:
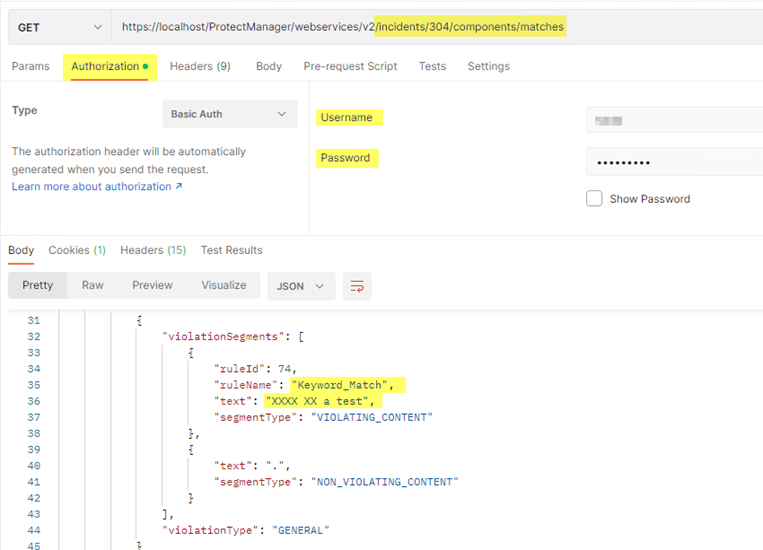
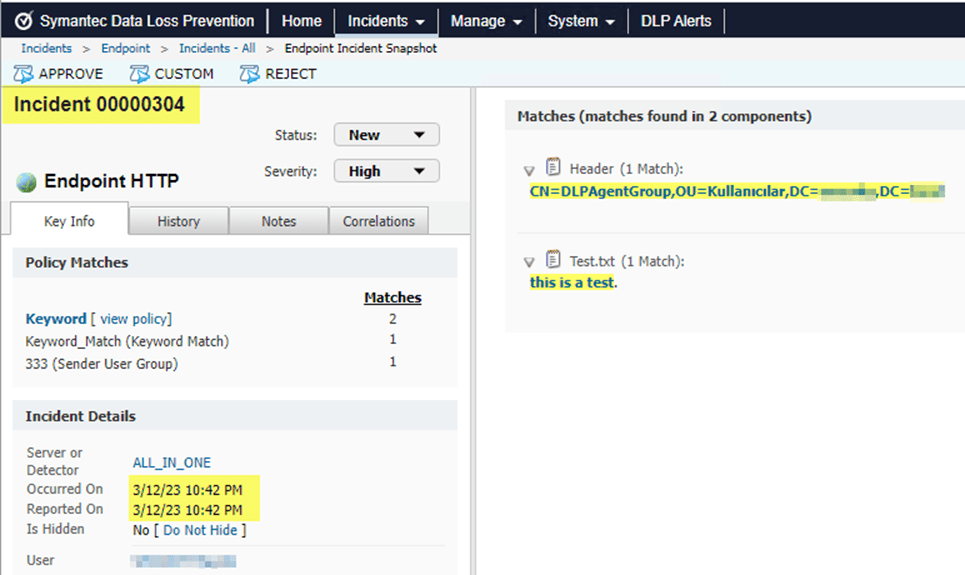
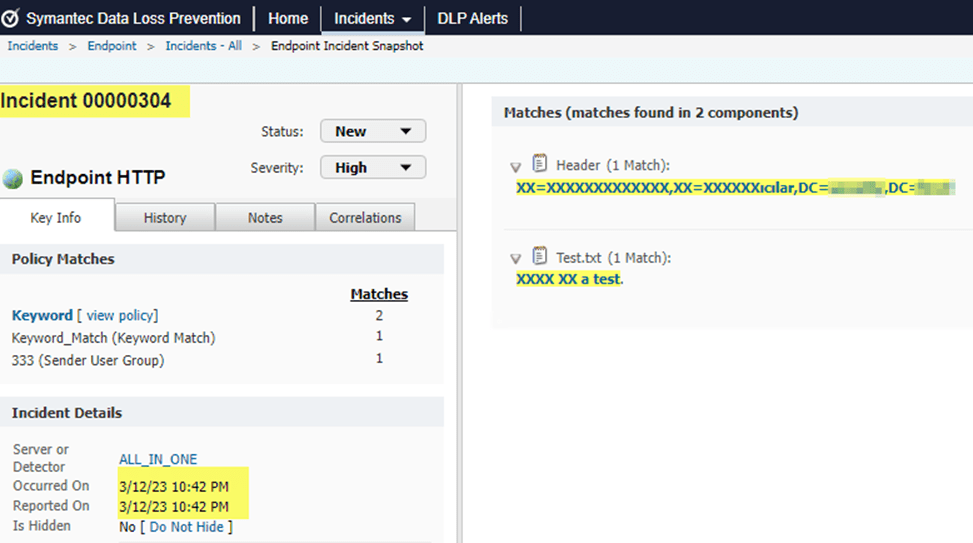
1-Incident Snapshots: You can see the masked incident message content in incident snapshots. The masked info is highlighted in yellow and is replaced with a capital Xs. Context information, such as the file size and the file name, is not masked.
2-Web archives
3-Rest APIs
Capabilities of Masking
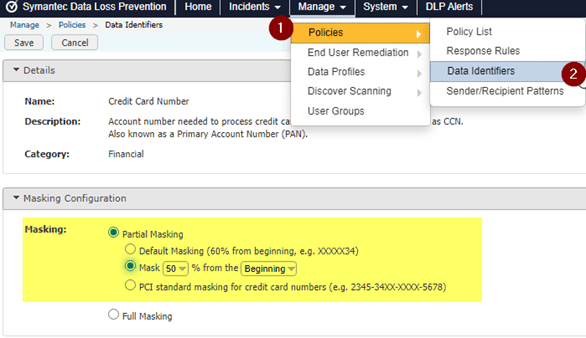
1-Characters that are masked: Alphanumeric characters are masked, but not punctuation characters. For example, a 60% masked US Social Security number can appear as XXX-XX-6789 or XXXXX6789.
2-Percentage of a string to mask: From 0% to 100% (rounded percentages only). Punctuation is not included in percentages.
3-Where to apply the mask in the incident: from the Beginning, from the Middle, or from the End.
4-The masking character is not configurable; it is always an X.
Masking Configuration
You can configure two types of Masking:
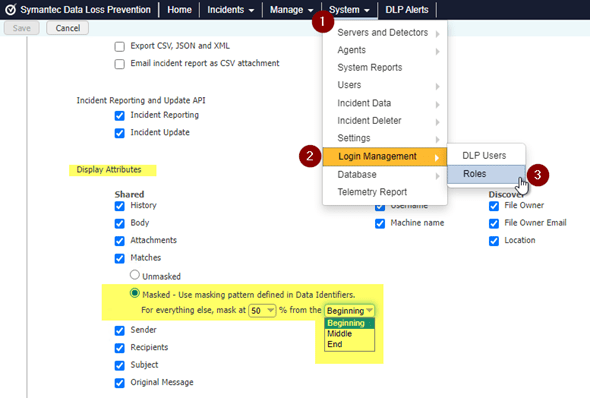
1-You configure Role-based masking at the System > Login Management > Role screen.
Note: Role-based masking has priority over data identifier masking. You must “turn on” masking at the role level to enable masking for roles and data identifiers. For example, if a role is set to unmasked, nothing is masked, not even data identifier matches.
2-You configure Data Identifier-based masking at the Manage > Policies > Data Identifier screen.
Setting Up Masking for Roles
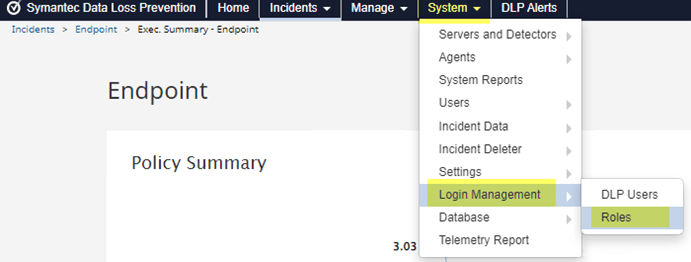
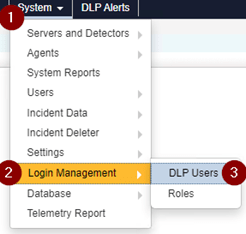
1-Go to System > Login Management > Roles to configure a role.
2-A new role is added.

3-See that the default role is Unmasked under Display Attributes > Matches
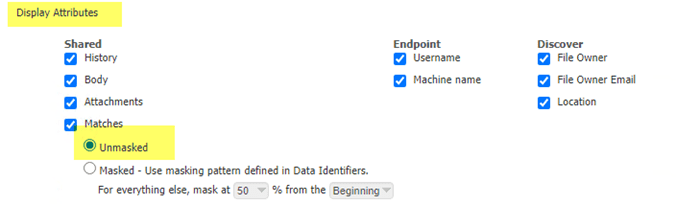
4-Check Masked to set the role to use the masking pattern defined in Data Identifiers. For everything else, the default masking is set to 50% from the Beginning.
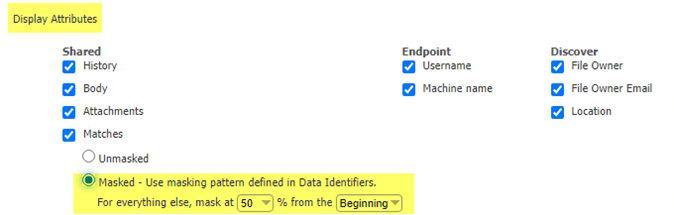
5-Click Mask at 50% from the Beginning. These settings are the default for partial masking.
a-Change the percentage to any whole percent in increments of 5 from 0 to 100.
b-Change the location where the masking starts to from the Beginning, or from the Middle, or from the End.
c-Choosing Masked at 100% completely masks sensitive data, other than Data Identifier matches.
d-Choosing Masked at 0% enables Data Identifier masking to take effect for Data Identifier matches, but this setting leaves other matches unmasked.
6-Continue configuring the role.
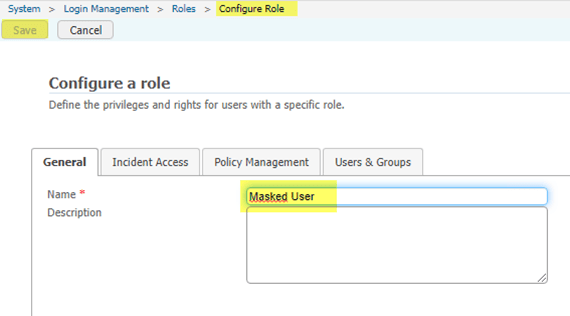
7-Click Save when you are done.
8-Go to System > Login Management > DLP Users to configure a role.
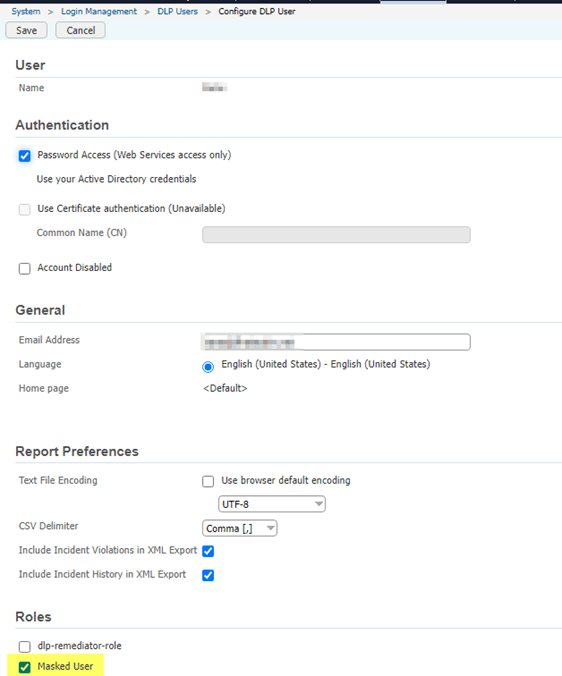
9-Click Save when you are done.
Example:
Masked configured user.
Masked configured user.
Rest APIs