You can find the steps to send your database usage information to your email inbox daily, weekly, or monthly before your Tablespace area becomes full.
You can view database usage information via the command I provided. I’m also sharing an example output with you.
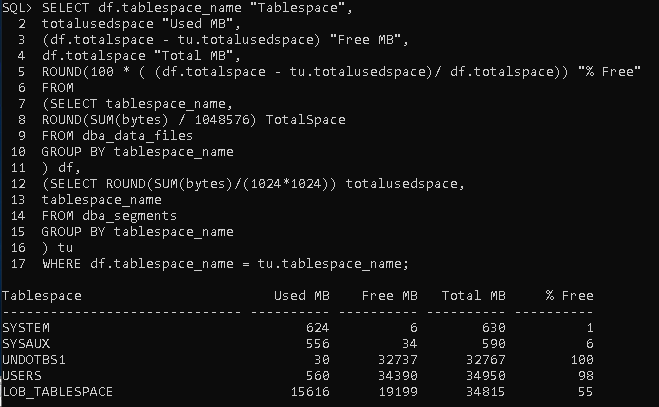
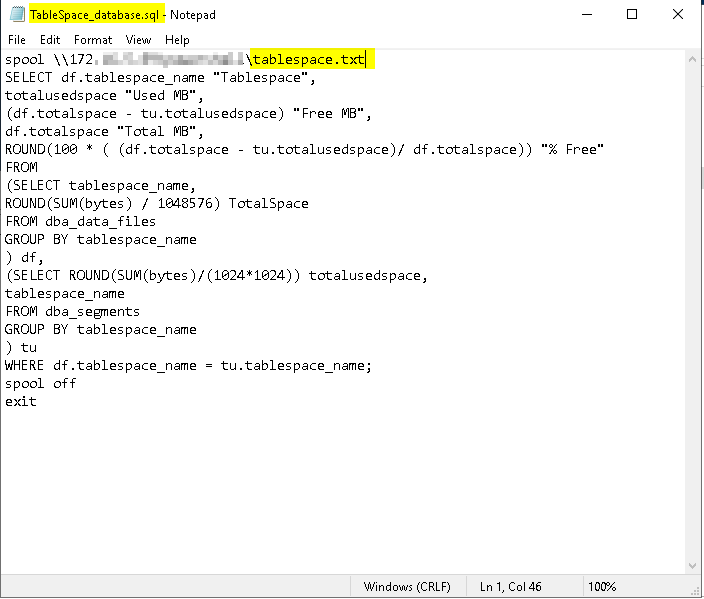
We create a file with the extension “.sql” for this command line, specifying the area where the command output will be captured.
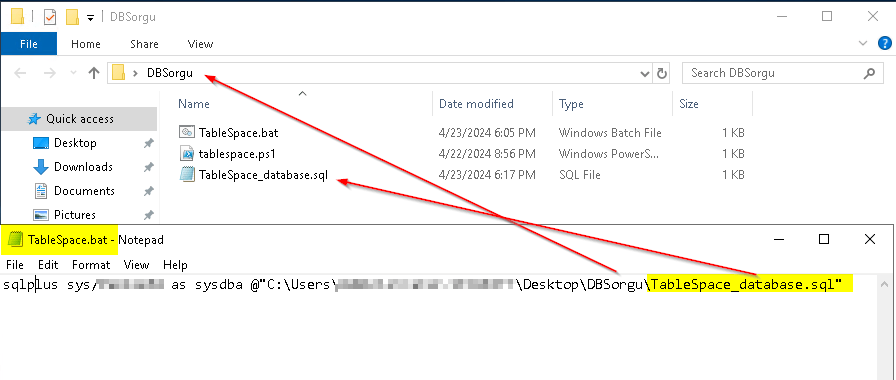
To run this command via Task Scheduler, you can create a “.bat” file containing the command and then set up a Task Scheduler definition. This command allows you to first establish a connection to Oracle with an authorized user and then execute the “.sql” command.
sqlplus sys/Password as sysdba @”C:\Users\Username\Desktop\DBSorgu\TableSpace_database.sql”
To open the Task Scheduler console, press “Windows + R” keys to open the Run dialog box, then type “taskschd.msc” and press Enter.
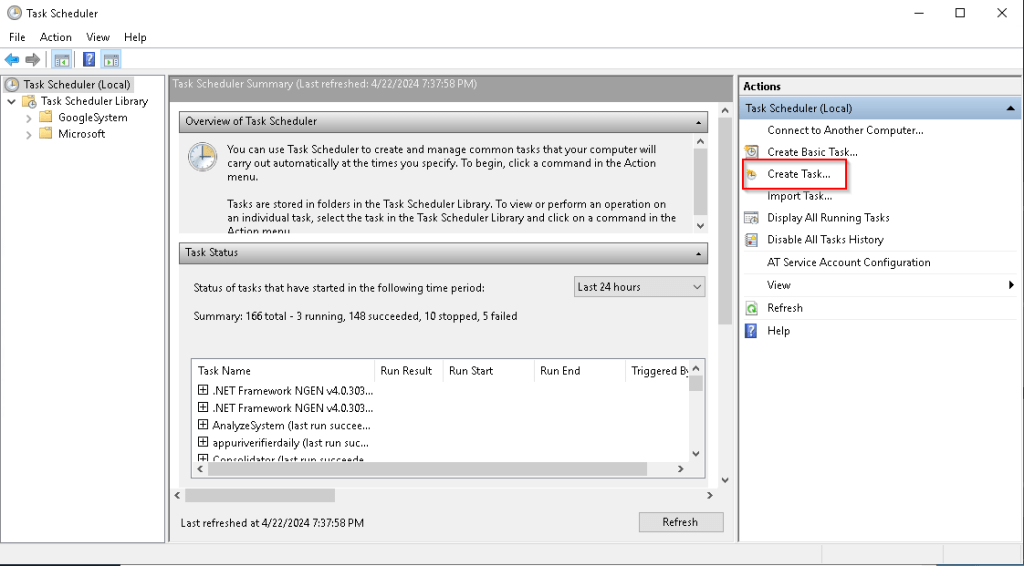
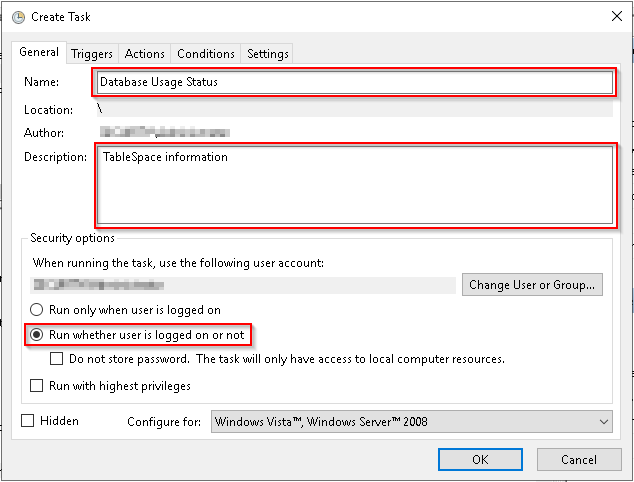
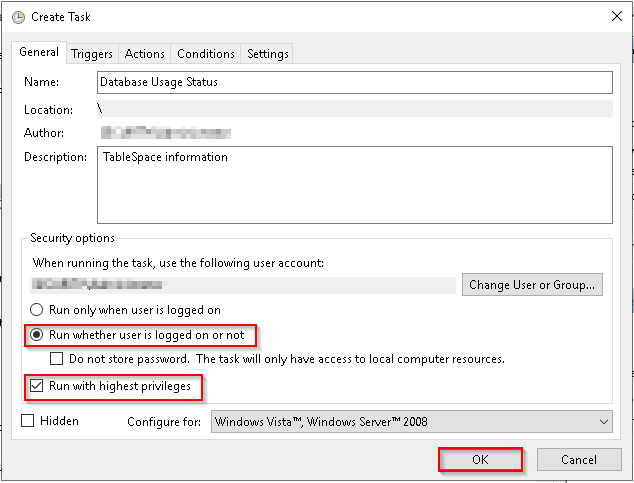
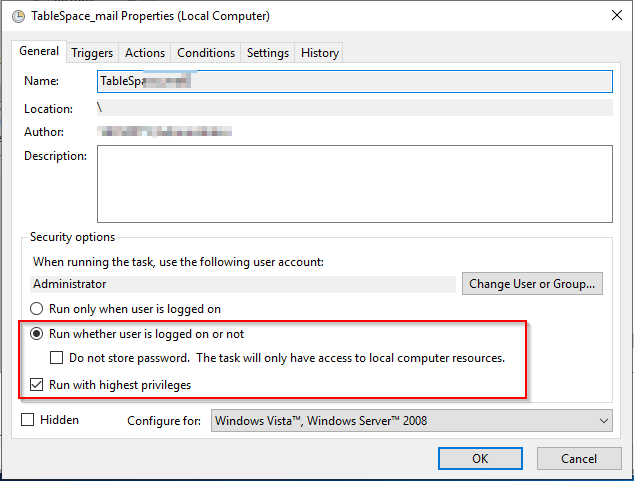
Click on the “Create Task” option and enter a name and description for the new task. Check the “Run with highest privileges” box to run the program with administrator privileges.
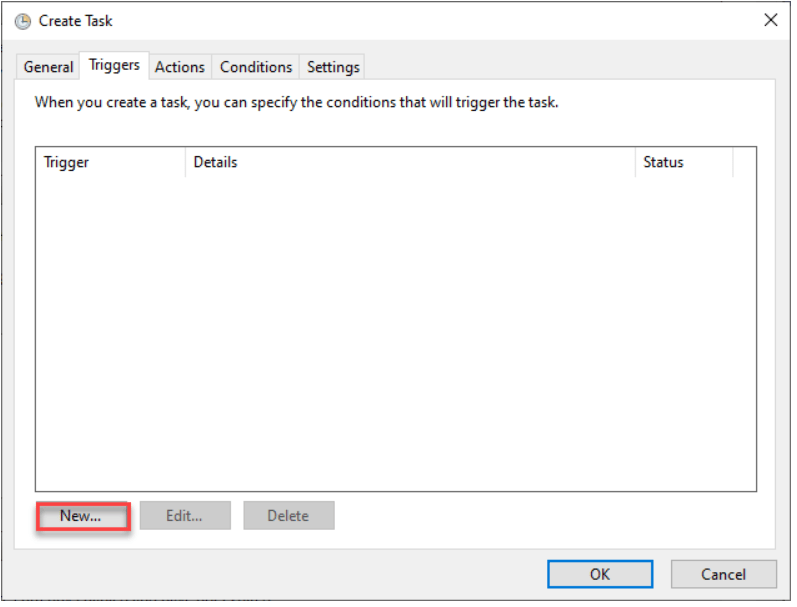
Next, switch to the Triggers tab and click on the “New…” button. Here, you can define the conditions that trigger the task to be executed.
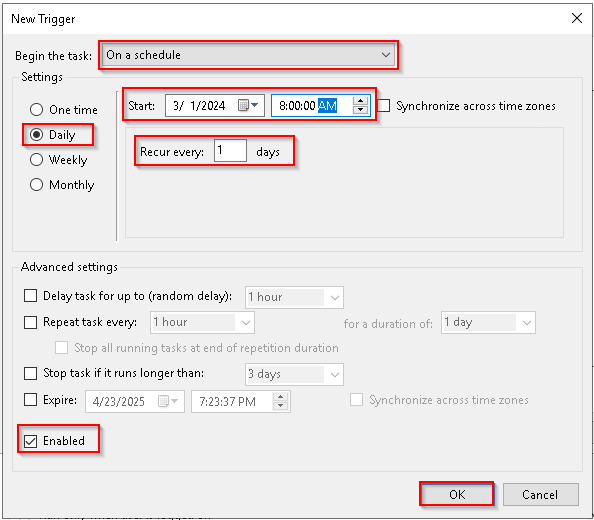
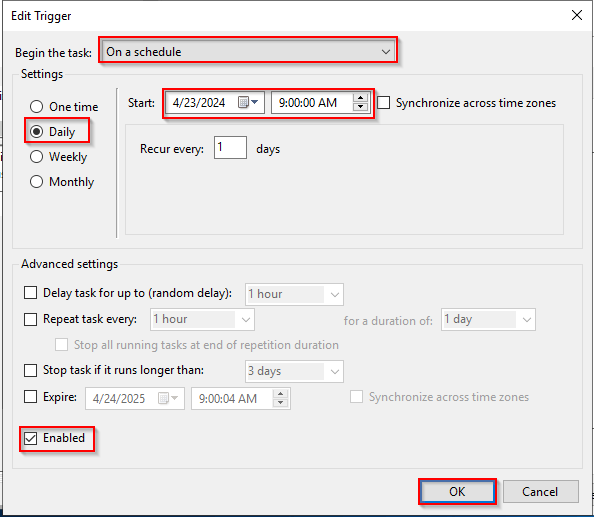
Since I will be performing these steps daily, I am planning the steps accordingly.
Select the “On a schedule” option, then choose “Daily” from the left side. Enter the desired time for the task to run, and ensure that the “Enable” option for the created trigger is selected.
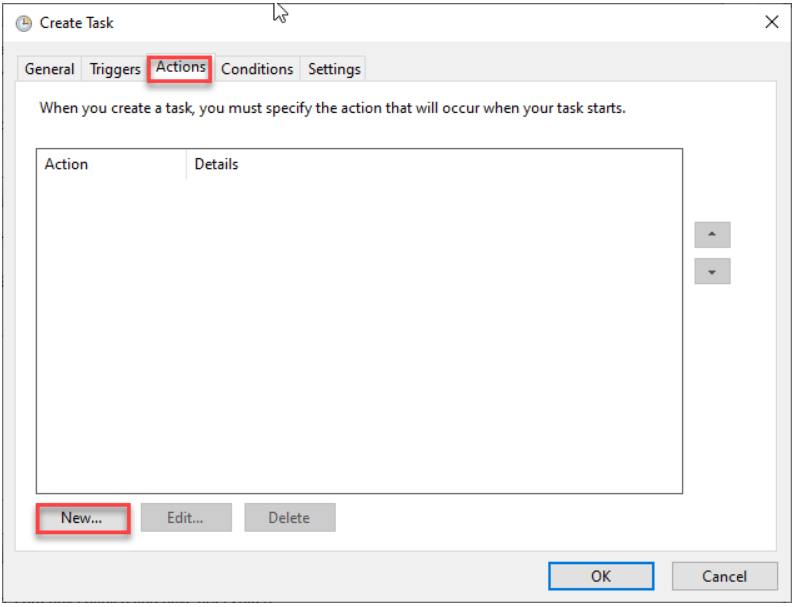
Go to the “Actions” tab and click on the “New…” button.
In the opened window, click on the “Browse…” button and select the “C:\Users\Username\Desktop\DBSorgu\TableSpace.bat” file. Then, in the “Start in” section, enter the directory path where your .bat file is located, such as “C:\Users\Username\Desktop\DBSorgu”.

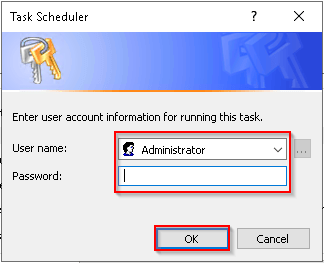
To ensure that our task can run even when no user is logged on to the computer, enter your username and password.
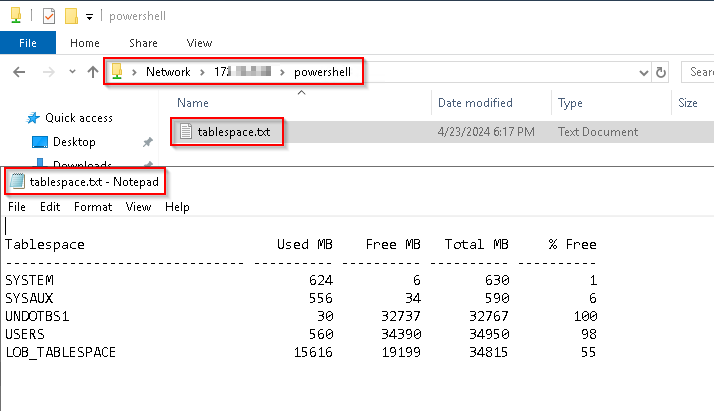
After Task Scheduler runs, you can find the location of the output and view its contents below.
After creating the file, you can send an email at a specified date and time range using a PowerShell command set up in Task Scheduler. First, save the provided command details as a “.ps1” file, and then show this file in Task Scheduler to set up the email schedule.
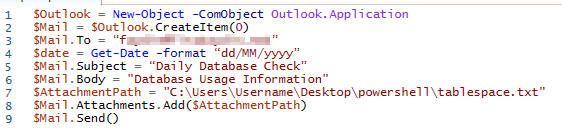
In the opened window, click on the “Browse…” button and locate the application “C:\Windows\System32\WindowsPowerShell\v1.0\powershell.exe”. Then, in the “Add arguments” section, enter the path to your PowerShell script file, such as “C:\Users\Username\Desktop\powershell\tablespace.ps1”.


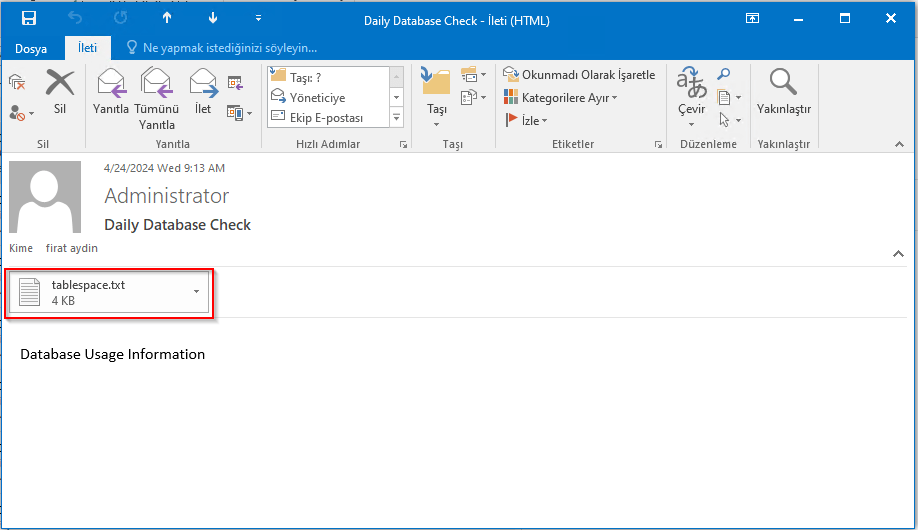
After completing all the steps, you will receive the following notification in your mailbox.