This document is Identity provider agnostic and provides generic steps.
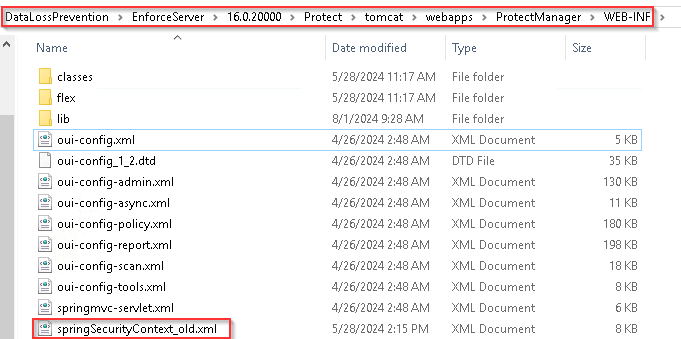
1- Rename (_old) the springSecurityContext.xml file in the [your install directory]/Protect/tomcat/webapps/ProtectManager/WEB-INF/.
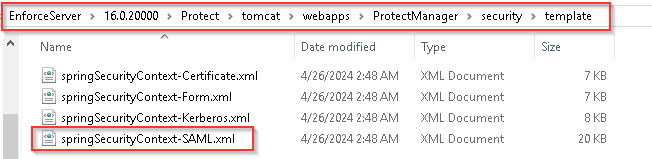
2- Go to the [your install directory]/Protect/tomcat/webapps/ProtectManager/security/template folder and select the appropriate configuration template file for your authentication method:
SpringSecurityContext-SAML.xml for SAML authentication configurations
3- Copy and rename the file “springSecurityContext-saml.xml” you selected into the [your install directory]/Protect/tomcat/webapps/ProtectManager/WEB-INF/ folder.
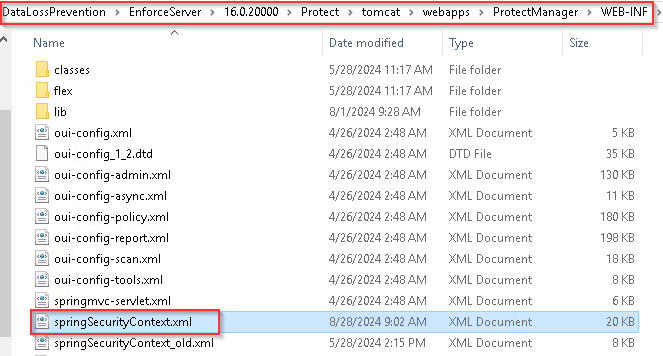
4- Configure the springSecurityContext.xml file:
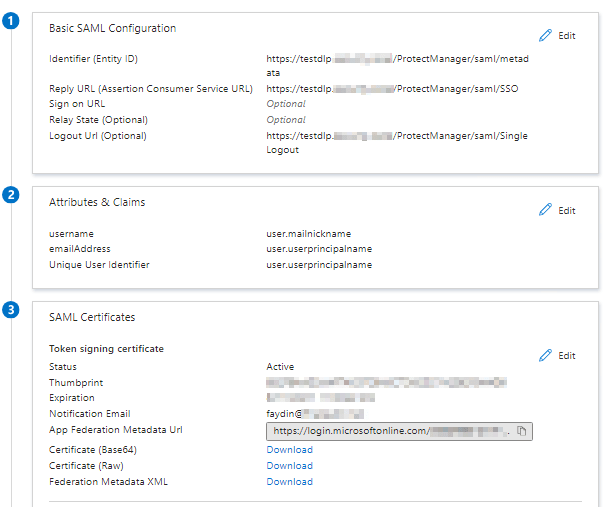
Open [your install directory]/Protect/tomcat/webapps/ProtectManager/WEB-INF/ and set the entityBaseURL property to your Enforce URL: https:///ProtectManager.

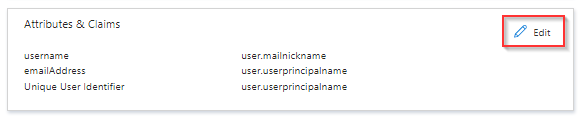
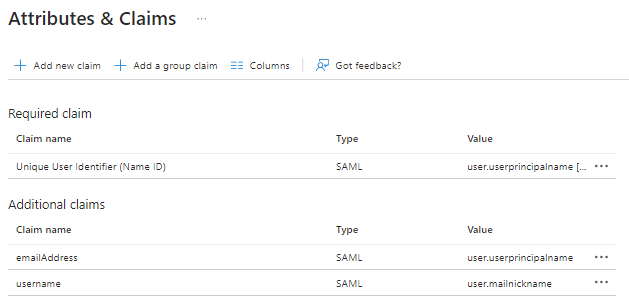
Set the property value of “nameID” by editing the property name =”nameID” value in the Spring file to a name identifier such as emailAddress, WindowsDomainQualifiedName, or another nameID that your IdP supports. Here’s an example for email address:

You may want to use a combination of user attributes returned from the IdP to identify a Data Loss Prevention user. In this case you can set the userAttributes property.
For example:

5- Restart Enforce Server.
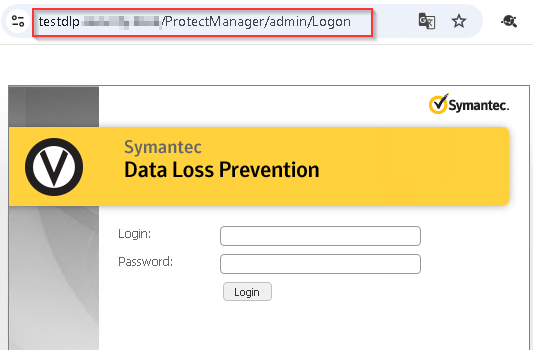
6- Log on as Administrator using the Bypass url.
” https://localhost/ProtectManager/admin/logon “
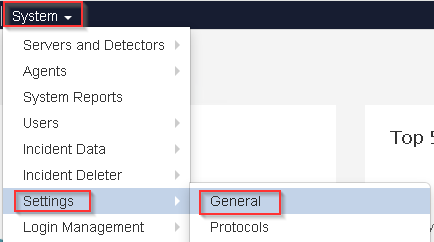
7- Go to System > Settings > General and navigate to the DLP User Authentication section.
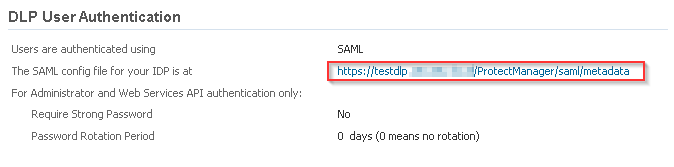
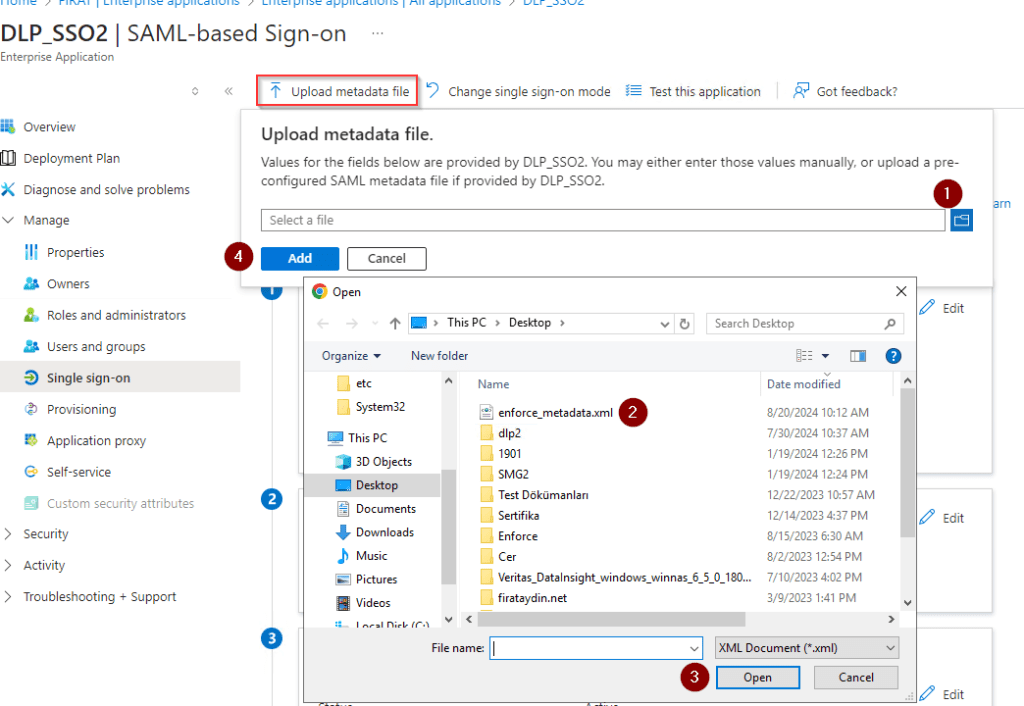
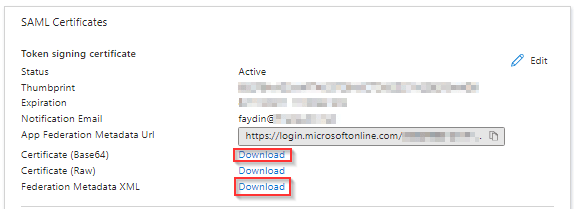
8- Click the link to the right of The SAML config file for your IdP is at to download the metadata.
9- For SAML, configure Enforce as a SAML service provider with the identity provider.
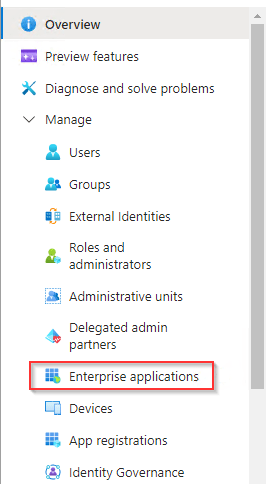
Click Enterprise applications.
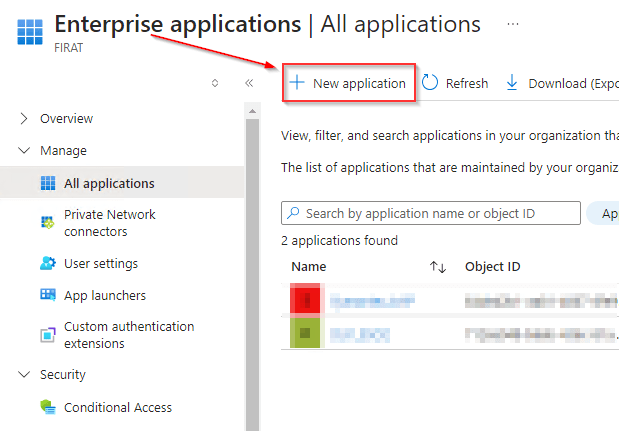
Click New application.
Click Create your own application

Click Single sign-on
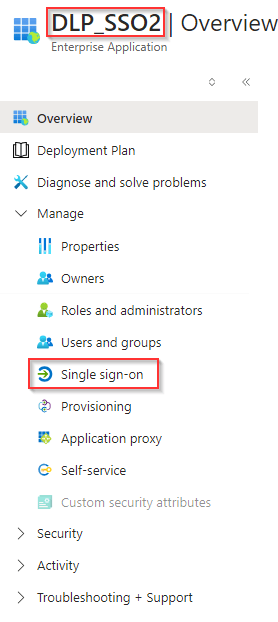
Click download Certificate and Federation Metedata.
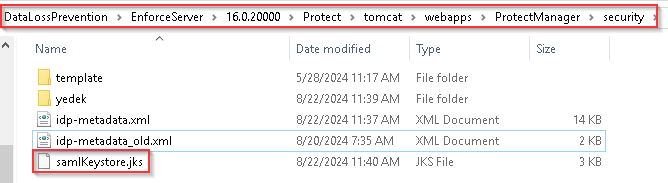
10- The IdP metafile you downloaded Replace the idp-metadata.xml file at /Protect/tomcat/webapps/Protect Manager/security/idp-metadata.xml and give it the same name.

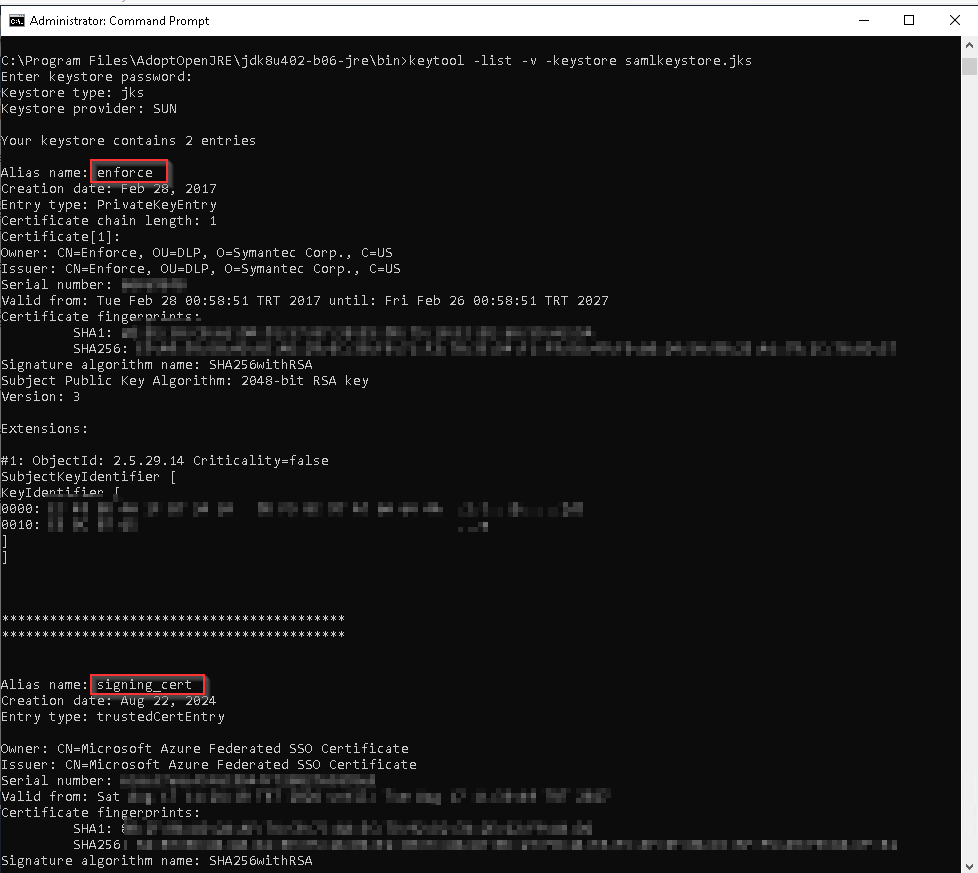
11- Import the Signing certificate into the DLP samlkeystore.jks
“keytool -import -alias signing_cert -keystore samlkeystore.jks -file signing_cert.crt -storepass protect”
Run the following command to see the certificate vault.The default certificate vault password is “protect”.
“keytool -list -v -keystore samlkeystore.jks”
12- Log on as Administrator using the Bypass url.
Update each user with a Valid SAML mapping.
System > Login Management > DLP Users SAML Name mapping section

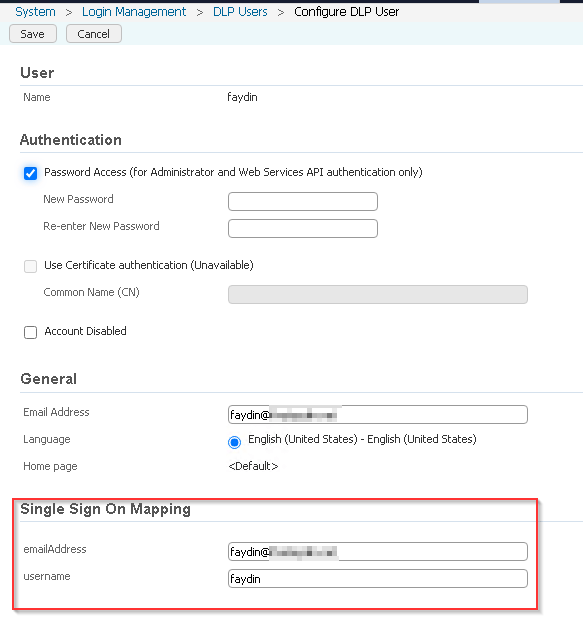
Note: Since it is case sensitive, fill in the mapping field according to the user information sent by the provider on the DLP side. Make sure it is the same.
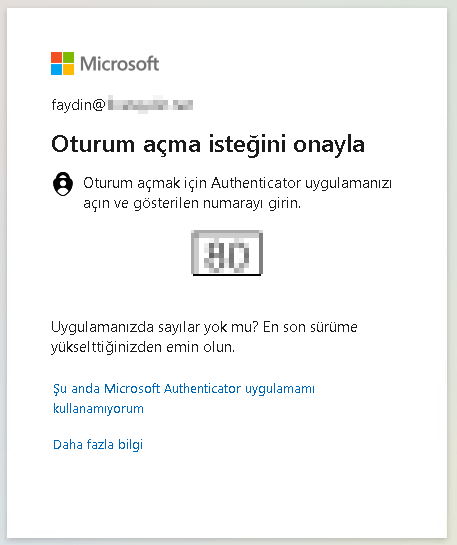
13- Once the IdP has been configured with the DLP metadata (also known as the sp metadata) you can attempt to login to the system using SAML.


Note:
In the DLP logs, users are unable to login and we are presented with the following “INFO” level error in the DLP localhost log:
AuthNResponse;FAILURE;EndpointMachine.domain.tld;https://Enforce.domain.tld/ProtectManager/saml/metadata;http://IDP.domain.tld;;;org.opensaml.common.SAMLException: InResponseToField of the Response doesn’t correspond to sent message a3128419c09317e646b9i212472eh83
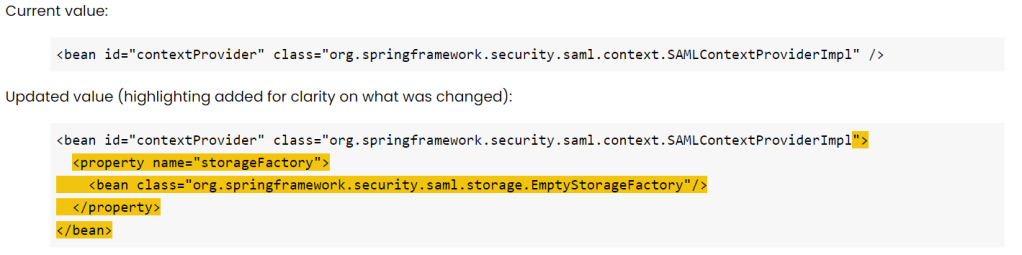
Configure the springSecurityContext.xml file:

Yorum bırakın